

Wireless Remote Best Practices

The passage of information has been key throughout time. In the picture aside, the british mark I tank, during the great war,had no radio installed. It relied instead on carrier pigeons instead.
Fortunately, we have radio to communicate with our welding machine through our wireless welding remote. however, there are rules you should ablige to.
These rules will shadow the way people count cards on the card game twenty one. We will assign values to conditions.
Favourible conditions will be given a +1. normal conditions will give us neutral or zero. And finally, unfavourable conditions will give us a -1 or even -2. Mind you, there are few +1’s and many -1’s
I will give a remote system a facevalue a score of +4 out of the box. And we will treat the score +-0 as end of line (no function)
Above and Beyond Practices
Receiver positioned above welder +1
Repeater System +3
Using Stinger and hand remote is positioned six feet up with a good path +1
Helper holding hand remote sideways five feet off ground +1
Neutral Practices
Receiver Cable strain pointing down +-0
Poor Practices
Every 100 feet -1
Deep Pit -3
Inside Building (metal walls) -3
Receiver positioned equal or below the top of welder -1
Hand Remote on pipe laying flat magnets pointing towards the ground -1
Receiver cable strain pointed anywhere but down -2
These values will be adjusted over time to depict true experience. I believe it will help not only you, the user, but us, the developer, to measure remote system performance.

SAE & Classic Correct 4 Prong Wiring
Before this tutorial, ensure you have read and installed flyback diode tutorial.
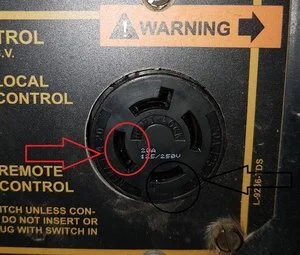
This tutorial is to confirm that your machine matches the wiring of the OEM four prong (L14-20R) often found on Classics and SAE's for the supplied dk rheostat receiver.
If you have a third party 5 Prong installed, read the next tutorial.
Failure to confirm or follow the steps to be mentioned may void warranty.
picture to the left indicates the two prongs we are to use The one in circled in RED is the (Y) prong. The Y is tied to the negative of the bridge rectifier by way of wire 600. The one in circled in BLACK is the (W) prong. The W prong in good order is often attached to the blue wire of the main shunt coils by way of the remote switch

These two wires could in theory be switched around and still work with an oem 150 watt Rheostat 64 ohm resistor. However, with this receiver, it requires to be installed correct to oem and maintain ground on the Y prong.
To measure or confirm, a multimeter set to measure dc voltage can confirm the polarity. Red probe on the slot opposite the only l-shaped slot. And the negative probe on the slot which is next to the flat part of the l-shaped slot. best I can explain it. Working properly, your measurements will be positive. In my case 57vdc at low idle, 120vdc at high idle. As well, you can confirm that the measurement goes away if the remote toggle switch is set to local.
Failure to have these in this wiring scenario, will result in receiver damage.

USB Side Thumb Remote Tutorial
If you have a side thumb remote attachable to your hand remote by way of usb, read the following:
Pitfall #1: Do not attach or use your side thumb when you intend to use Up5 Down5 (red and green buttons)
Pitfall #2: Remember which mode your hand remote is in. check max amps in dial mode to jog your memory)
To get into side thumb mode, make sure you are in three turn dial mode, attach your side thumb, clip both loops together, and turn your thumb dial all the way up. It will say “SIDE THUMB OK!”
Now, your main dial is deactivated and your buttons have the possible functions:
1) green button hold with the main dial not max is hotstart
2) main dial at minimum then pressing both buttons kicks you out of side thumb mode (back in I guess if you side thumb is on and left all the way up)
3) main dial max and ““holding”” red lets you set your max amps on the side thumb only
4) main dial min and ““holding”” green lets you set your min amps on the side thumb only
PROTIP #1: If the side thumb min and max are opposite of what you would like, you can set min during red max hold, and set max during green min hold.
PROTIP #2: If you have a second mode, second calibration enabled, to flip calibrations, your main remote dial must be in the max position during hand remote startup. Otherwise, it will remain in the previous mode
Wireless Remote Best Practices

The passage of information has been key throughout time. In the picture aside, the british mark I tank, during the great war,had no radio installed. It relied instead on carrier pigeons instead.
Fortunately, we have radio to communicate with our welding machine through our wireless welding remote. however, there are rules you should ablige to.
These rules will shadow the way people count cards on the card game twenty one. We will assign values to conditions.
Favourible conditions will be given a +1. normal conditions will give us neutral or zero. And finally, unfavourable conditions will give us a -1 or even -2. Mind you, there are few +1’s and many -1’s
I will give a remote system a facevalue a score of +4 out of the box. And we will treat the score +-0 as end of line (no function)
Above and Beyond Practices
Receiver positioned above welder +1
Repeater System +3
Using Stinger and hand remote is positioned six feet up with a good path +1
Helper holding hand remote sideways five feet off ground +1
Neutral Practices
Receiver Cable strain pointing down +-0
Poor Practices
Every 100 feet -1
Deep Pit -3
Inside Building (metal walls) -3
Receiver positioned equal or below the top of welder -1
Hand Remote on pipe laying flat magnets pointing towards the ground -1
Receiver cable strain pointed anywhere but down -2
These values will be adjusted over time to depict true experience. I believe it will help not only you, the user, but us, the developer, to measure remote system performance.
The Wizard of RodDecember 5, 2019
Original Blog is complete at dkwremotes.ca/blog
It will be transferred time permitting -> dkwremotes.ca/blog
Remote Set ID 779: 250.00USD owing including shipping. customer refused to pay as it was not a known cause and effect. repaired and returned on May 13, 2024 Suffered high voltage injection . pic #1 andre*******@icloud.com
Remote Set ID 648: Suffered high voltage injection. 377.53USD owing including shipping. customer refused to pay. andy******@gmail.com
Remote Set ID 676: Suffered high voltage injection. 335.00 paid including shipping.
Remote Set ID 395: June 14, 2024: Suffered high voltage injection. 185.00 including shipping. paid, repaired and shipped. pic #3 fixed
Remote Set ID 473 June 21, 2024 Quote ongoing. high voltage injection. paid customs incurred. product was valuated as 600USD pic #4 fixed
Remote Set ID 546 July 8, 2024 Quote ongoing. high voltage injection. fixed
Remote Set ID 847 Oct. 10, 2024 high voltage injection. 385USD including shipping
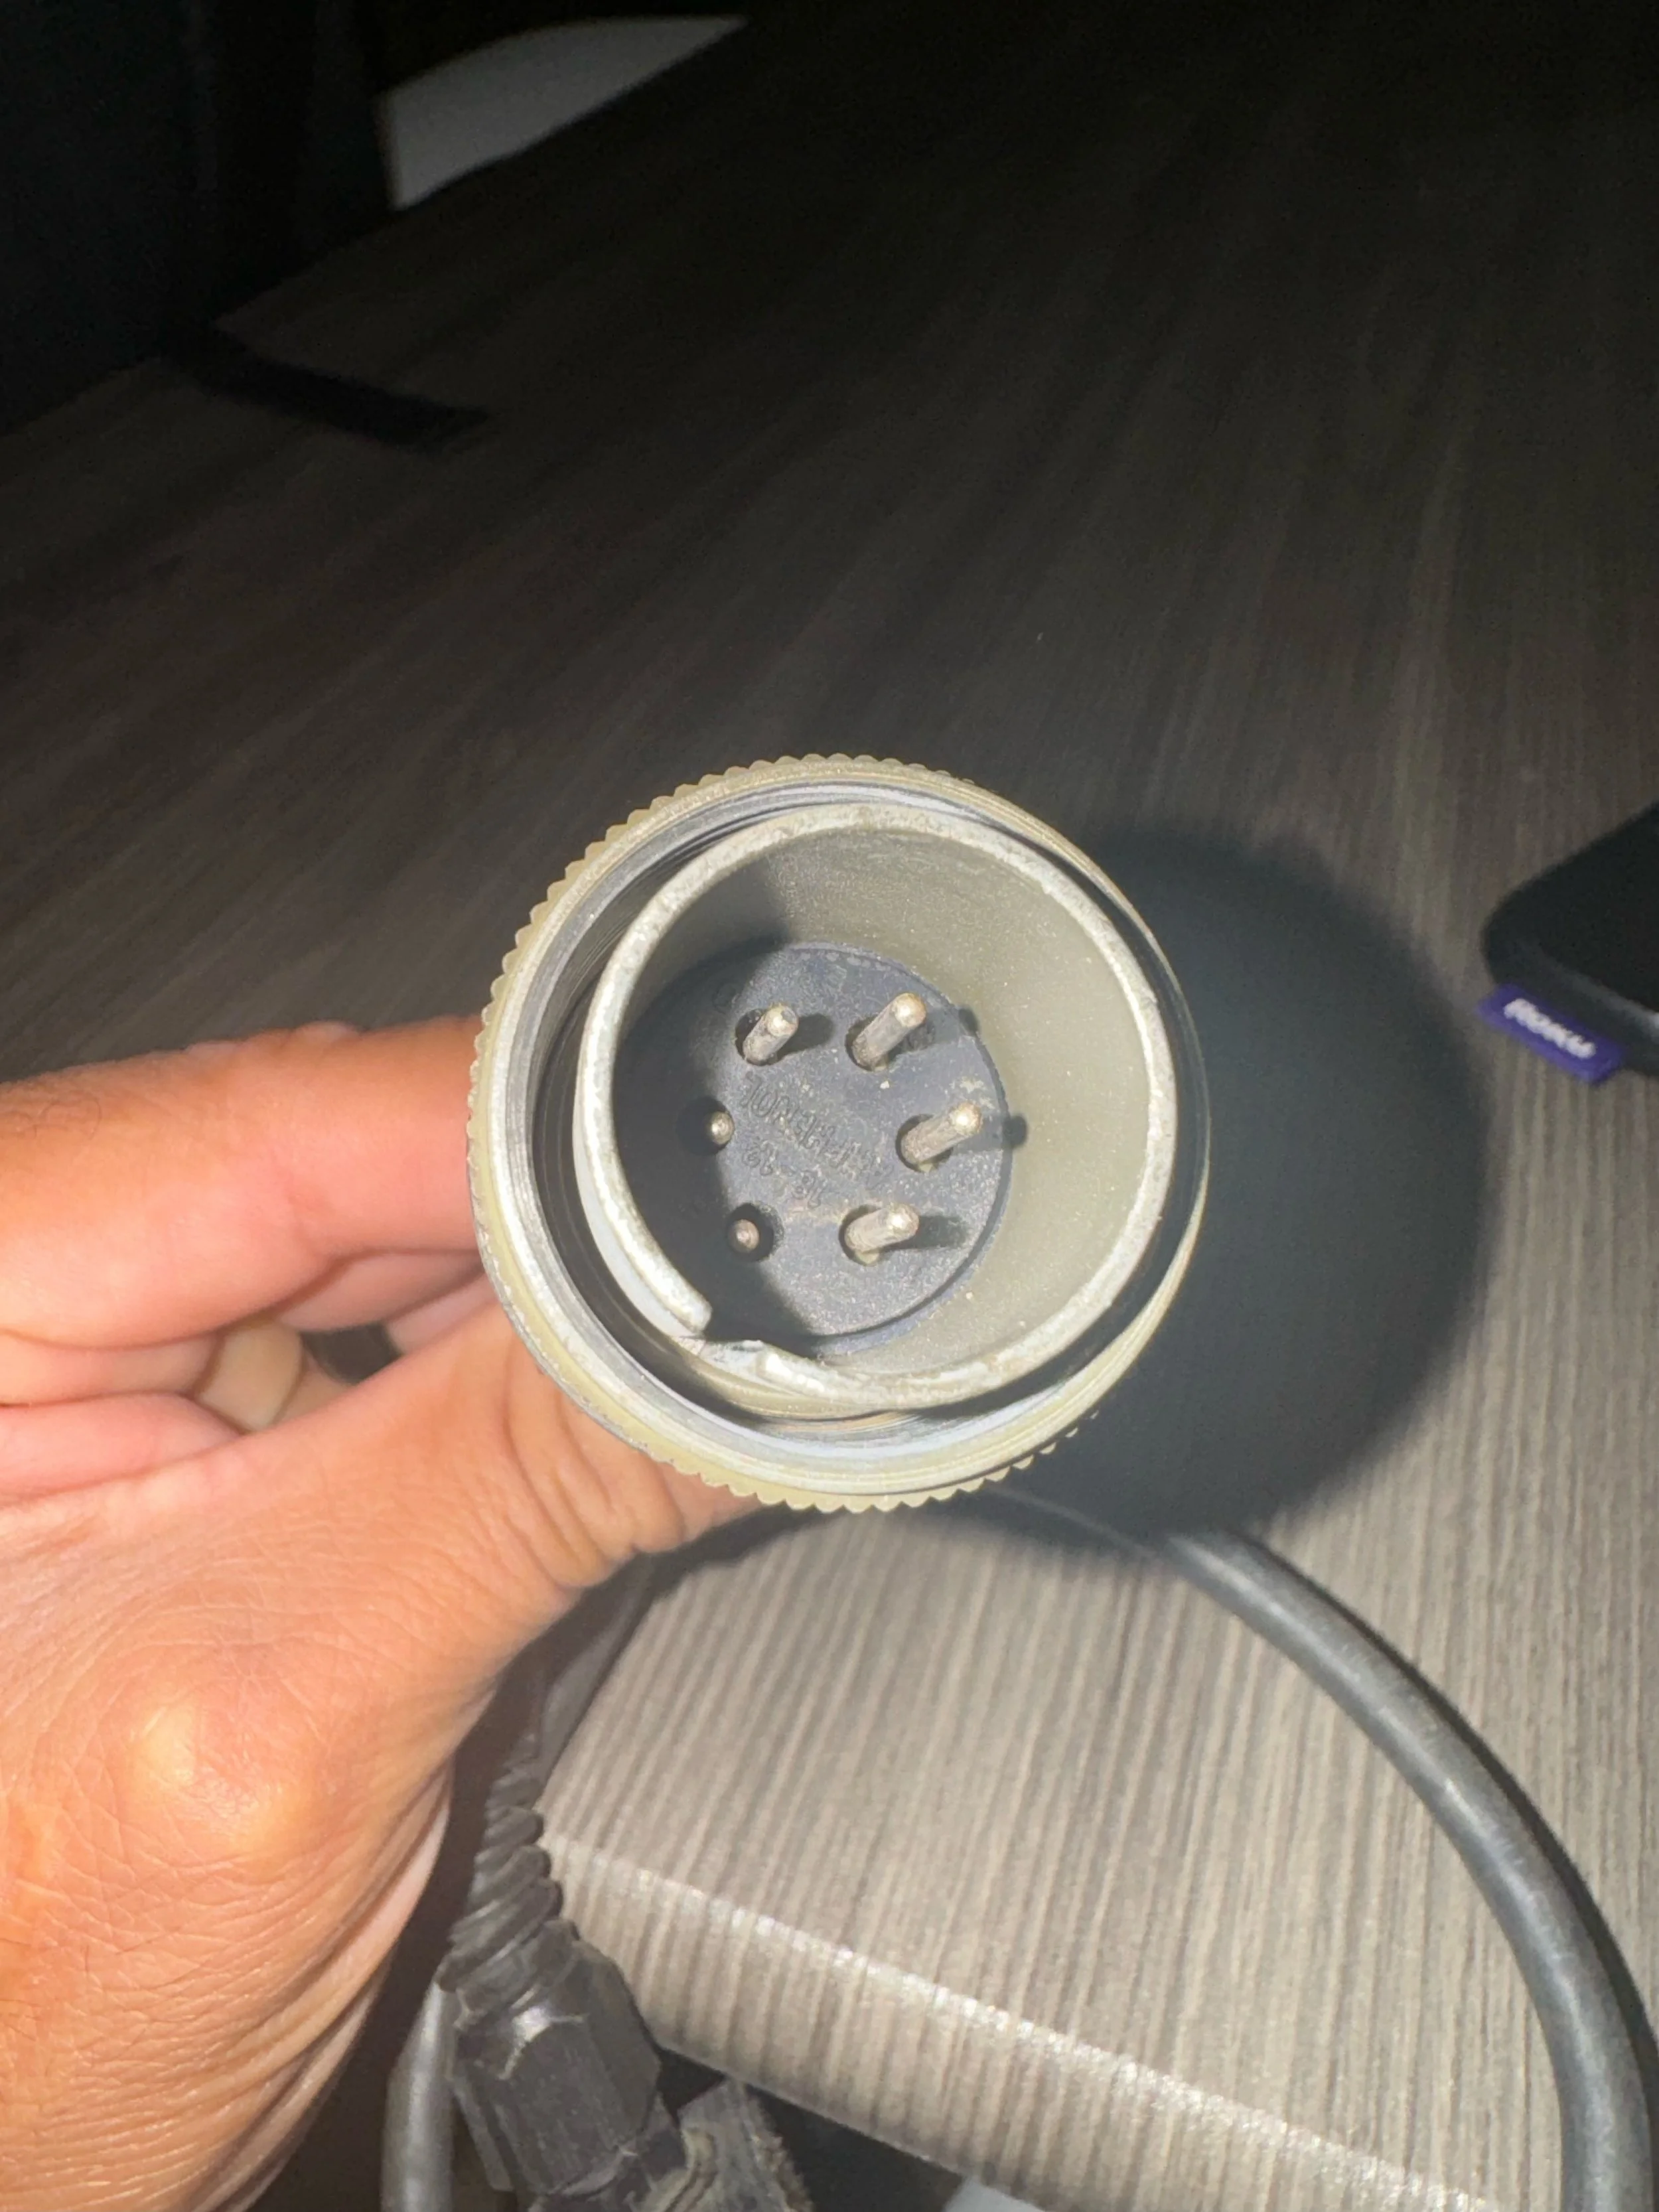
Remote Set ID 203R April 28, 2025 high voltage injection from six pin being inserted into 5 pin arclink receptacle 485USD including shipping


Warranty, Effective January 1, 2017
Make note: If the Warranty outlined below does not qualify your gear for warranty work, items may be repaired for a agreed cost.
In addition to the following terms, DKW Remotes has a no refund policy countered by an excellent warranty. Buyers remorse, inability to communicate, or loss of employment are not valid reasons for inter company communications
Limited Warranty
Subject to the terms and conditions below, DKW Remotes, warrants to its original retail purchaser that new DKW Remotes equipment sold after the effective date of this limited warranty is free of defects in material and workmanship at the time of payment.
Within the warranty periods listed below, DKW Remotes will repair or replace any warranted parts or components that fail due to such defects in material or workmanship. The method utilized will be at our discretion. DKW Remotes must be notified in writing within (7) days of such defect or failure, at which time DKW Remotes will provide instructions on the warranty claim procedures to be followed.
DKW Remotes shall honor warranty claims on warranted equipment listed below in the event of such a failure within the warranty time periods. All warranty time periods start at the time of purchase of the equipment to the original end-user purchaser.
1. 1 Year Parts 1 Year Labour (excluding water and physical damage)
All items sold excluding Items 2 & 3.
2. 12 Months Parts 12 Months Labour
Batteries
3. These following items have no expectation of warranty as they are a consumable and wearable part (They are repairable for a cost)
Thumb Remote and mechanical buttons including on/off switch.
DKW Remotes - Limited Warranty shall not apply to:
1. Units operated outside of temperature guidelines (-40C to 85C), or parts that fail due to normal wear. Unit logs temperatures outside these bounds.
2. Equipment that has been modified by any party other than DKW Remotes, or equipment that has been improperly installed, improperly operated or misused based upon industry standards, or equipment which has not had reasonable and necessary maintenance, or equipment which has been used for operation outside of the specifications for the equipment.
Limitation of Liability
You expressly acknowledge and agree that, to the extent permitted by applicable law, use of the product is at your sole risk and that the entire risk as to satisfactory quality, performance, accuracy and effort is with you. We do not assume any liability for any special, indirect, incidental, punitive, or consequential damages of any kind whatsoever, including but not limited to loss of profit or revenue, loss of data, loss of use of the product or any associated equipment, cost of any replacement goods or substitute equipment, or loss of use during the period the product is being replaced or repaired. Without limiting the generality of the foregoing, in the event of a product replacement, we are not liable for any associated financial loss or consequential damages of any kind.
Further, in no event will we be liable for any accident, injury, death, loss, judgement or other claim related to or resulting from the use of this product. We specifically advise you, the consumer, against using DKW Remotes products in a manner inconsistent with the agreement, our online tutorials, and other accompanying documentation. In no event will DKW Remotes be liable for damages in excess of the original product purchase price.